Thursday, March 22, 2018

November 2017

In November, my attention was mostly on my job. My students and I went to Disney World during Thanksgiving, and I had a big performance coming up at the beginning of December to prepare. The progress on the UHS project mostly focused on superfical elements, such as textures and UI elements. 

First, a big breakthough was in the brick textures. Initially, I tried creating the bricks individually, but even with minimal Subdivision surface (a smoothing modifier that multiplies the polygons), that resulted in tens of thousands of polygons. Also, it looked bad! I had already tried creating normal maps using the bake normals feature in Blender when I made the tile texture, so I did the same thing for bricks. A good explanation of a normals map is at https://youtu.be/U7PQGgz1RII

Below is a comparison of two methods. On the left are bricks represented by a flat texture with a normals map (in theory, only 2 polygons), and on the right is a wall created with individual bricks (1,293,604 polygons). The version with the normals map is much more satisfactory, as it renders more realistically and uses less GPU processing power. I did, however, have to color the bricks individually, but only for a single row of 28 courses. It is only evident from a distance that the pattern repeats. 


The texture (on the right) was created  in Blender by baking a normals map directly from the model of the bricks (on the left, behind the flat plane).


I created a variation of this brick texture for the areas of the building that had white glazed brick, for example, the bathrooms. I used the same normals map, and changed the red color to solid white. I also added an alpha layer to make the mortar non-reflective ("rough") while keeping the brick faces smooth. 


 I was not satisfied with my earlier version of the stair walls, so I recreated those, and added railings. 


I had previously been adding color to the hallways by adding a flat plane over the wall. This ends up with an additional draw call, so it is not ideal. Since I needed the color to be on the rounded portions of the stairs anyway (and adding a plane would defeat the work I did modeling the round stair walls), I experimented with using a decal to add the color. A decal is essentially a texture projected onto a surface. This proved to be much simpler. 


I have no photographic evidence of the actual color in the hallways. The only photos I have are in black and white, so I used a combination of a 1917 Montgomery Ward paint swatch (from antiquehome.org), and artistic license/guesswork.


Many of the rooms in the reference photos included floor rugs. I found images of rugs online, and created several variations. 


The final addition in November was the modeling of the brick sill in the stair portals. 


October 2017

October found some successes and failures in freehand modeling. The big take-away: modeling by hand is HARD! 

First, I scaled the successful door arches from last month to fit the auditorium windows. 


I also created an exterior auditorium door with a functioning/animated push bar. 


I started the Biology window in August, but got good enough at Blender to actually complete it this month. The difficulty came in extruding the corners, which I did not initially realize was a possibility. 


This is an abandoned attempt to model the tower ornament myself in Blender:


In the end, I used photogrammetry instead. This is the combination of 25 photographs:


It was time to start on the main entrance. The arch was traced from the Royer blueprints while the owl and ornament just below are photogrammetry .


I used a photo from the 1926 Rosemary to create the L-shaped desk in the main office.


The auditorium lanterns were tricky. I based them off two relatively unclear photos. I have been unable to find these fixtures in any contemporary lighting catalogs, or in any other building, which makes me suspect that they were created specifically for the high school. 


I made a trip to the school in late September during which I took many reference photos. Some of those were useful to create the wall in the Principal's office. I took over 40 photos of the proscenium that I hoped to use for photogrammetry, but the lighting was not sufficient to yield acceptable results. Instead, I modeled the crest in Blender manually. 


The pillars holding up the auditorium balcony are not in the original plans, so I had to use photos references to create them in Blender. They did not lightmap well (ie, the brown splotches), but they serve their purpose. 


Finally, I made a return trip to the Champaign County Archives to scan their copies of the original floorplans. These are different from the blueprints because they are not as detailed. My suspicion is that they were created by Royer's firm to show to the community what the overall layout of the building would be. I had photocopies of these from 2001, but they were photocopied at 100% onto tabloid paper, and none of them actually fit, so they are in halves. I considered rescanning the photocopies, but instead I scanned the originals on their large-format scanner. 


The ground floor plan. Note that the gym wing with the pool is included, as well as a space for a 3-story "future extension" which would make the building symmetrical. 


The first floor plan, again with the gym addition. 


Finally, the second floor plans. 


Remember, these floor plans include the gym addition. In 1914, the south wing of the building (on the right side of the plans) ended with the Men's teachers room. This photo from the 1915 Rosemary serves as confirmation. 


I created a simple easel in Blender, and used it to display the scanned versions of the floor plans as if they were there to direct first-time visitors to the new building. 


Over the month of October, I greatly improved my skills in Blender, but I know my limits! I can easily trace over a geometric design with acceptable results (the main entrance arch, for example). If accuracy is not important, I can also create something using a photo reference (the easel, main office desk, or proscenium crest). The detailed exterior limestone carvings, however, are more organic in nature, so I will rely on photogrammetry to reproduce them (the tower ornaments and owls). 

Thursday, March 8, 2018

September 2017

School started up in the middle of August, so I slowed down on the project. However, there was a long weekend and a random vacation day in September, so I got a lot done!


The long-demolished smoke stack with a terra cotta cap. The smoke particles are from the UE4 starter content. 


Unhappy with the look of my 6x6 red floor tile, I learned how to create a custom normals map using Blender. This allows the use of a texture file to create detail in the surface of the tile (or any surface) instead of millions of polygons of actual geometry. I used the tutorial from Ionwe at https://youtu.be/o-OgkrWX94I. First, I had Blender bake a normals texture:


Then, I added it to the tile texture I made earlier: 


Not perfect, but much better!


This screenshot also shows the brick pillar I made out of individual bricks. This ended up taking way too much time, even with multiplying each brick course in Blender. 


These are the walls in the typewriting classroom. Around this time, I switched the floor from the maple texture from the UE4 starter content to the wood floor in the PolyPixel Freebie Pack. 


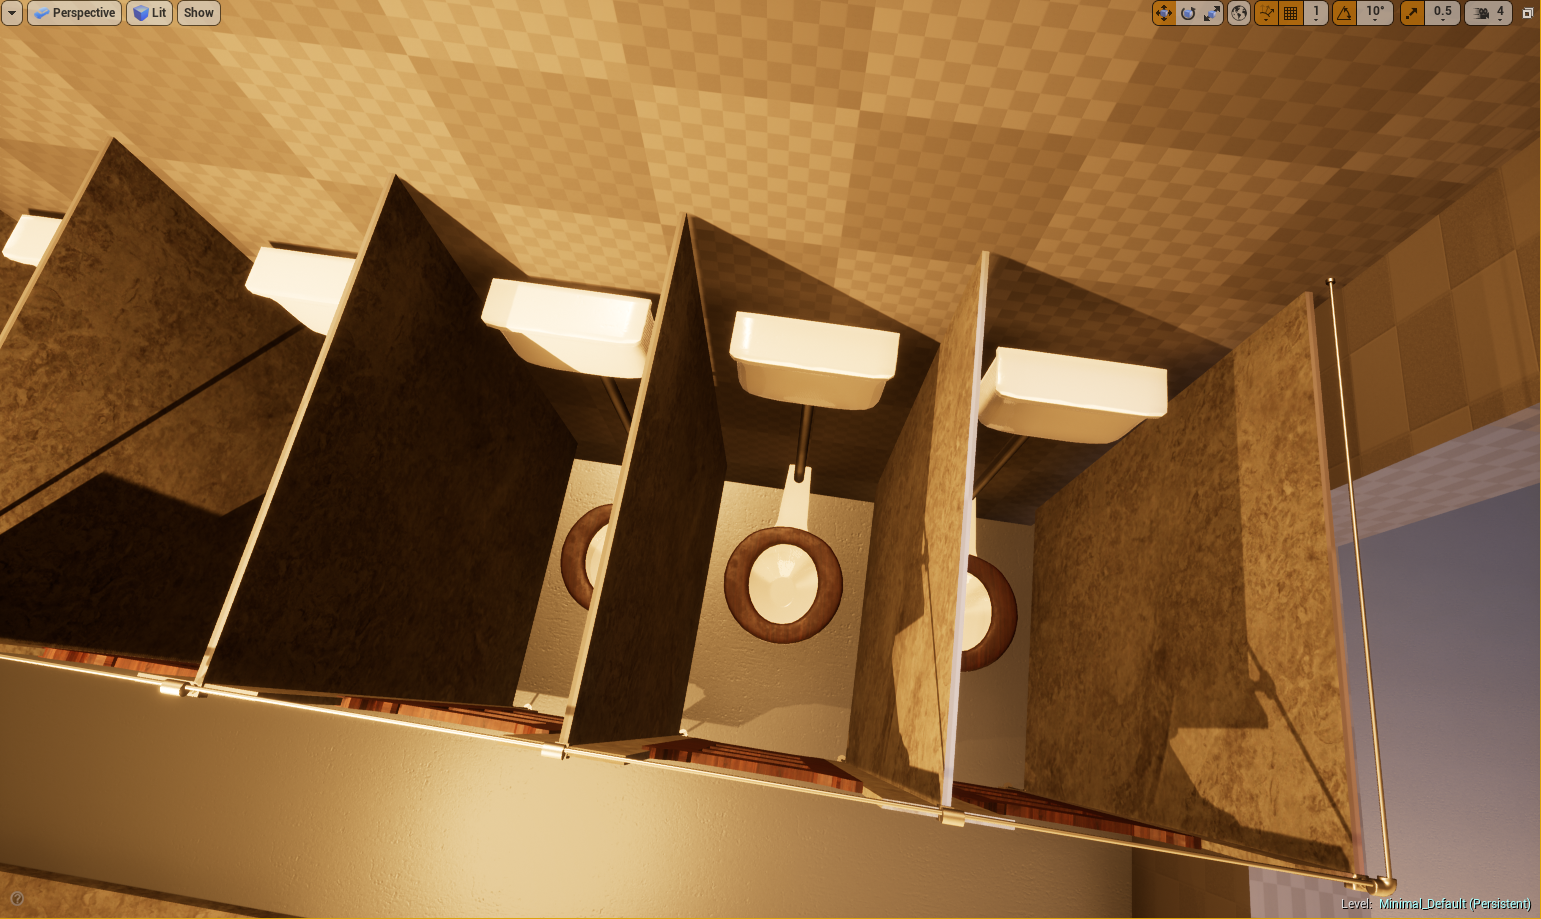
The doors and walls for the bathroom stalls are in the building plans, but the actual fixtures are not included. I traced the doors and nickel hardware, used unit conversion for the measurements of the marble stalls, and used a mixture of reference photos and imagination for the fixtures. I have no idea if the urinals or mirrors had Tudor arches, but it fits in context of the project!


Time to make auditorium seats! I used these reference photos:


... modeled them in Blender:


And finally, filled the balcony:


Using the same technique for the hall tiles, I made stair treads based on this reference photo: 


... and here they are on the stairs to the tower:


Lockers for the locker room:


I'm calling these the "stair walls." I'm not sure if that is the correct term, but I created them in Blender all in one piece. 


It is at this point that I started disliking how my early models looked, and gave them another try. This is my second attempt at the plaster work over the auditorium doors. This new model is the one upon which I based the plaster work around the windows in the auditorium as well. 


The brass rails in the auditorium balcony:


Just as it was in the bathrooms, the stalls are clearly marked in the building plans, but the hardware is missing. I used reference photos to create these shower stalls:


The building plans have details for a wainscot in the principal's office that includes Tudor arches, but I know from my experience in the building that it was not constructed this way. A quick trip to the school for a reference photo ... 


... resulted in the office partition, partially traced from that wainscot in the plans: 


And that's the end of September!